30 January 2013.
Time for Another Round of... Sandwich Spreads, Dips & Sauce Bases.
Is it that time of the week already? Probably.
I must admit that tin and I are still working on that huge jar of humus I made last week, and, shockingly, we have a lot of red beet spread left, too. So this week I only made 2 spreads and a dip.
Just Hokkaido.
The hokkaido squash is one of nature's greatest gifts to the lazy cook. They're small, super-easy to open (if you've struggled to cut through a butternut squash, you will be delighted when your knife suddenly easily slides into the hollow interior of a hokkaido). Best of all, the absolute worst part of the squash battle is a non-factor when working with hokkaido: the unique peel of a hokkaido is edible. That's right. When you bake them, the peel softens and while it is indeed possible to spoon the cooked flesh away from the rind, I'd encourage you not to.
I prepped my hokkaido by washing it (because I did indeed plan to eat the ENTIRE thing). I cut in into quarters, removed the seeds, and put it on a lined baking sheet. I sprinkled each quarter with salt, fresh black pepper, and a generous amount of freshly-grated nutmeg. I crushed the equivalent of 1/4 tsp of a cinnamon stick and sprinkled a tiny bit on each piece of squash.
No oil, no margarine. The squash, as it bakes, will produce enough moisture on its own.
I baked my seasoned hokkaido at about 425 degrees for approximately 45 minutes, until the flesh could be easily pierced with a fork and the skins were just starting to take on a few patches of dark brown color.
Simply remove them from the oven and allow them to cool. There will likely be a little bit of "water" sitting in the groove of each piece of squash -- don't poke around at it. It will be reabsorbed by the squash as it cools.
Turning the cooled hokkaido into a spread requires only a fork (seriously getting out your blender for this would be ridiculous). Put the pieces in a mixing bowl and give them a good mash with the back of a fork. Peel and all.
Cream Cheese.
If you thought you had to lose the convenience of a bagel with cream cheese, you were wrong.
You probably have to swap the bagel out for a piece of whole-grain toast (most bagels have egg). But my vegan cream cheese is a little bit tangy, a little bit sweet, and super-spreadable -- (almost) just like the original.
Among its many other uses (many of which I'm sure even I am yet to discover), a good piece of tofu can even serve as the perfect base for a mock-cheese. When blended, extra-firm tofu will take on the consistency of something between a crumbly blue and a ricotta, and its neutral flavor allows you to decide how sweet or savory, how subtle or potent you want your "cheese" to be.
To mimic the consistency and signature flavor of classic cream cheese, I begin with 200g of extra firm tofu. I give it a rough chop and put the cubes into my blender along with 4 Tbsp of coconut milk and 2 Tbsp of natural soy yoghurt. As in the red beet spread from last week, almonds find their way into this recipe as well -- about 1/8 cup of whole raw almonds will do the trick.
Why almonds?
Because raw tofu has a dirty secret.
Over time, say, a week in your refrigerator, your uncooked tofu will emit liquid. You could eliminate this by pressing the liquid out of the tofu, but I find this to be, quite honestly, a really drawn-out and ultimately unnecessary process. A few raw almonds will happily absorb this moisture and you'll save yourself some time (and dishtowels).
To the almonds, tofu, coconut milk and yoghurt I add 1 tsp of bourbon-vanilla, a squeeze of lemon juice and a little bit of zest, and a tiny pinch of salt.
I give it all a spin in the blender. Let it go for a little while, until the mixture forms a paste. I'm not going to lie to you, here -- you're not going to end up with something as solid as cream cheese. But you should end up with something spreadable, not crumbly (so if you still have a crumble, I recommend adding another tablespoon of coconut milk).
If you prefer flavored cream cheeses, you can spice up this recipe any way you'd like. Here are a few suggestions:
-For a sweet cream cheese, add a teaspoon of raw sugar.
-For a savory cream cheese (which also makes a great chip-dip), add 1/2 to a full teaspoon of fresh dill.
-For a fruity cream cheese, add a spoonful of your favorite jam -- or better yet, blend fresh (or thawed frozen) fruit directly into the cream cheese mixture.
Salsa.
I like to keep a good tomato-based salsa around because it's good for pretty much everything. You can eat salsa with chips; I like it with a thin layer of cream cheese on top of a slice of toasted bread; it's instant pizzaz for a plain bowl of noodles; come to think of it, I put a little spoonful of salsa on top of almost everything, because there's nothing like a fresh tomato to brighten up a meal (stay tuned -- now that I'm armed with a jar of salsa, this is bound to happen over the course of the week).
For one jar of salsa, I use six roma tomatoes, a medium white onion, and two chili peppers. I put it all in the blender with a generous amount of black pepper, and salt to taste -- and I give it a whirl. I like to leave a few larger bites of tomato behind, but the consistency is up to you.
You can make your salsa spicy or mild (this one is, believe it or not, pretty mild, but you could also use bell peppers rather than chili peppers). You can add kernels of corn to the end product (i.e., don't blend the corn).
FYI: This salsa freezes well.
Wednesday, January 30, 2013
Tofu Noodle Soup
29 January 2013.
It's Like Chicken Noodle, But Not.
On a cold winter evening, nothing satisfies quite like a steaming-hot bowl of soup. This recipe is my vegan take on everybody's childhood favorite. I think it's fair to say that no two bowls of chicken noodle soup are alike -- every mother has her own special recipe, probably passed down over generations. I've made this soup quite a few times already this winter, so I can safely say that I'm starting a soup tradition in my own home. And an animal, earth-friendly one at that.
My tofu noodle soup is inspired partly by one of my all-time favorites: miso soup. The pure simplicity of a miso is hard to beat. So I, too, begin with a simple broth -- I use a powdered vegetable broth base in a big pot of boiling water. At this point, for my part, I could chop a few pieces of green onion in there, pour myself a mug-full and... ta da!
Maybe a lovely appetizer, but last night, I was in the business for a main course.
So I added vegetables.
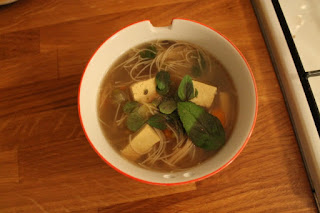
What you put in the soup is really up to you. Traditionally (I'm going to go ahead and use that word), I use 1 cup of peas and a bok choy. I put them in the boiling vegetable broth along with 100 grams of tofu (chopped into bite-sized pieces). I add some fresh black pepper and let everything simmer for about 5 minutes. At that point, I would add noodles (I prefer udon noodles, but you can use absolutely anything -- I've used bifun and classic Chinese curly-noodles -- I imagine if you're really looking for that chicken noodle soup vibe, you could add spiral noodles...). I finish the soup with some chopped green onions and fresh basil.
tin occasionally complains that we never eat the exact same thing twice. (This blog has already been difficult for me, I must admit, because I'm not the type of person who pays particularly close attention to exact quantities...) I maintain that we have eaten this soup, precisely as described above, at least twice.
The other times I made some slight alterations. Sometimes you've got to be a little bit flexible. If your grocery store doesn't have bok choy, pick up a cabbage -- I used savoy cabbage once; last night I used the remainder of a small head of radicchio and a handful of parsley. Think of the above recipe as a reliably good base. It's certainly good on its own, but it's also simple -- it leaves a lot of room on the flavor spectrum for additions. So last night, I added 3 small carrots and 2 small potatoes.
I think that this soup is particularly good when served with red pepper sauce and soy sauce. And don't forget the fresh basil leaves -- seriously, it seems like a little thing (and it is!) but it makes a world of difference.
Tuesday, January 29, 2013
Tasty Pastries and Coconut Popcorn
28 January 2013.
Two of my favorite (sweet) things: Tasty Pastries and Coconut Popcorn.
Maybe it's because it looks like Berlin is covered by a fine layer of confectioner's sugar, but yesterday, I was in the mood for dessert.
For those with an unrelenting sweet tooth, making the change to a vegan lifestyle doesn't have to mean saying goodbye to cookies, cake, muffins... Sure, some of the convenience/immediate gratification factor will be reduced -- your average piece of cake at your favorite coffee shop will contain butter, milk and eggs. But try to see this as a good thing -- by making your own dessert at home, you get to control how much fat and sugar you'll be consuming.
Yesterday, I made two of my favorite, super-easy sweet things, and now I'm passing them on to you.
One of the greatest creations known to man is puff pastry. It really doesn't get any easier than puff pastry -- pick it up in your frozen section (make sure it's vegan -- many contain butter), follow the super simple thawing/baking instructions, and you're pretty much guaranteed, no matter how inept you are as a pastry chef, to end up with a beautiful and irresistible end product.
After listening to tin drop subtle hints for the past few weeks about how much she likes marzipan, I decided it was time to prove that I'm not completely oblivious. I chose a variety with only two ingredients -- pure local honey* and almonds. (You can also find marzipan made from sugar and almonds.)
*If you're an attentive vegan reader, you know what I just did there. Honey isn't strictly vegan. And while I understand the arguments that vegans make against eating honey, I can give you just as many and more reasons for why you SHOULD keep eating honey -- certain honeys. When it comes to honey, do your research -- you should support beekeepers who keep things small, who don't transport their bees from one end of the country to the next, who don't expose them to pesticides and herbicides, who don't swap out the queen bee for a younger (genetically-engineered) model every few weeks. (i.e., you should support beekeepers who stand apart from the monoculture system.) Honey bees are in danger, and there are still beekeepers who care and who are doing their best to ensure that there are healthy, productive bees to support equally healthy plants. Look at your local whole foods store and you'll likely find several varieties from your town/the surrounding region. Write down the names, go back home, and do your research. Call the beekeepers, pay them a visit -- most will be overjoyed to talk about their work. As an eating, living human being, you are dependent upon the honeybee whether you realize it or not. Ultimately, as a vegan, this has to be your decision -- hardliners will say no to honey on principle. Here's one article to get you started: The Great Vegan Honey Debate. Do your research so that you can make an informed and personally justifiable decision.
I used two pieces of puff pastry (to make two pastries). In the middle of the dough, I laid down a layer of marzipan (about 1/2 Tbsp) and covered with about 2 Tbsp of frozen mixed berries. -- You can certainly use fresh berries, sliced apples, a few mint leaves... I topped the berries with a few rubs of lemon zest and another 1/2 Tbsp of marzipan and then folded the dough into a closed pocket (I trust you to figure this out). I smeared the tops of my pastries with a small dab of margarine. Follow the instructions on your puff pastry dough -- mine went into the oven at 400 degrees for 15 minutes, until golden... puffed... and flaky. Take them out and immediately sprinkle the tops with raw sugar (or you can hit them with a little powdered sugar -- you decide).
With dessert finished, I turned my attention to preparing one of my favorite snacks: popcorn. I buy my own whole kernels. If you have an air popper, I'm jealous -- I put a thin layer of rapeseed oil* (essentially odorless, flavorless -- you can also use canola) in a deep pot, just enough oil to cover the bottom. Add the unpopped kernels to the pot, again, enough to cover the bottom. Cover and heat on the stove until the popping stops -- shake the pot occasionally to make sure that every kernel has a chance to pop. I made about 4 cups of popcorn.
*If you've never heard of rapeseed oil, don't freak out when you google it -- it's much more than biodiesel. It contains both omega-3 and -6 fatty acids and is low in saturated fat.
Popcorn is a yummy low-calorie snack on its own, but can also take on many different flavors -- sweet, savory, spicy. I decided on a simple, sweet variety: just margarine and coconut. In a separate small saucepan, melt 1 Tbsp of margarine. Add a pinch of salt and 2 Tbsp of very finely shredded coconut. Stir it all together, and pour over the popped popcorn -- mix as you go for an even distribution.
There are few greater pleasures in life than warm, fresh popcorn, but I make enough to keep munching for a couple of days.
Saturday, January 26, 2013
Celebrating this Rare Moment
26 January 2013.
Today, inspired by this really rare moment of sunshine in Berlin and an inherent warm & fuzzy feeling in my heart for my favorite (only) niece, Maren, I spent a little time with my glue stick, colored paper and pencils. Some lovely butterflies.
Front.
Inside.
(A couple of really good photos, courtesy of tin.)
Parsley Pesto
25 January 2013.
Another Twist on a Classic: Parsley Pesto.
It was finally time to take serious action. In anticipation of falafel night, tin picked up a HUGE bunch of parsley (she claims that it was the smallest one they had, and I believe her, but seriously, it was basically the entire plant). It was beginning to wilt, despite our better efforts to keep it moist by occasionally misting it with a spray bottle... It was time to make pesto.
Pesto is traditionally made with basil, pine nuts, garlic, olive oil, salt & pepper and finished with grated parmesan cheese. But if you're willing to experiment, almost any herb (dill, rosemary, mint) can serve as a delicious, unexpected base for a pesto. You can prepare your pesto well in advance and set it aside in a cool place/in your refrigerator to allow the flavors to marry -- I simply warmed mine briefly before mixing it into my pasta.
I had plenty of parsley at my disposal -- and if you're making a pesto, you should, too. While the spaghetti noodles were bubbling away, tin chopped about 2 cups of fresh parsley (approximately 1 cup per person/serving of pasta). I finely minced three cloves of garlic (anywhere between one and three will do -- it's a potent ingredient, which I happen to like a lot). I threw everything directly into a deep skillet (if you have a wok, use it). To the parsley and garlic I added a dash of salt, a lot of fresh black pepper, the juice of half a lemon, and one finely chopped sun-dried tomato -- just one will go a long ways in the flavor-department -- don't shake all of the oil off and back into the jar -- in fact, I scraped every last bit of it off of my cutting board and into the skillet.
I skipped the nuts. If you're really dying for the nut component, I recommend using walnuts in a parsley pesto (not more than 1/4 cup chopped). If you choose to use the nuts, skip the tomato -- the parsley should really be the star of the show, and it's easily overwhelmed when too many other fancy ingredients come to the party.
Perhaps surprisingly, my favorite part of a pesto is the texture of the parmesan cheese. To make my vegan pestos, I mimic this texture by adding crumbled tofu. For two servings, I use about 100g of extra-firm tofu. This time, quite frankly, I was too lazy to get out my blender (because that would mean having to wash it) -- but if you have one, you'll probably balance out the time you spend washing it afterward with the time I spent chopping all of this stuff by hand. (I just really hate washing dishes.) I very, very, very finely diced my tofu -- but if you put it in your blender, you'll quickly end up with a crumble that looks something like cheese.
At this point, since I was making my pesto and pasta at the same time, I turned the heat on low and warmed all of the ingredients in my skillet. My goal was simply to take a little bit of the edge off of the massive amount of raw garlic I threw in there (and if you're making your pesto ahead of time, one clove will do -- the raw garlic will only get stronger over time). I heated it through (only about a minute) then added my cooked & drained spaghetti noodles to the skillet -- thus, again, if you have a wok, you are really in business.
I added olive oil. Please, please, I'm begging you... don't drown it -- 2 tablespoons, tops -- I only used about 1, since I already had that oily tomato in there. Added oil is the fastest way to take your meal from healthy to "I didn't know vegans could be fat, too."
As a little surprise, I added about 1 cup of peas. (I can find a reason to put peas in pretty much anything.)
And there you have it -- pasta with pesto. Yum.
Friday, January 25, 2013
The Joy of a Simple Sweet Potato
24 January 2013.
Sweet Potatoes & Vegetables.
Not every dinner has to be so complicated -- not that I want to imply that my previous posts required any sort of super-human commitment. But as much as I love to cook, even I can admit that once in a while, I don't feel like standing in the kitchen for more than a half hour. This meal took me even less time to prepare, and didn't even require that I hover over the stove to monitor the entire cooking process. So here's my Friday gift to you: a really easy, yet satisfying, dinner. As I said in a previous post, the joy of vegan cooking, for me, is about discovering how food really tastes -- without chemical preservatives and added sugars. I give you nature's candy: The Sweet Potato. And yes, in my world, you can have candy for dinner.
I started by scrubbing the dirt off of two medium-large sweet potatoes. Sweet potatoes are an AWESOME source of vitamins A and C -- their high beta-carotine content makes them powerful antioxidants, and for athletes (or even the casual gym-goer), sweet potatoes also have anti-inflammatory properties.But DON'T THROW AWAY THE SKINS*. A significant amount of the sweet potato's beta-carotine is hiding in there.
*If you really, really don't like to eat your potatoes in the skins, wash the potatoes anyway. Peel them, but try to peel in long strips. The peels can then be boiled on their own until tender. Simply pat them dry, place them on a lined baking sheet, and drizzle/brush LIGHTLY with olive oil (I recommend putting a little dab of oil on your fingertip and stroking each peel -- it won't take much oil); add your desired seasoning (salt & pepper, of course -- for a spicy flair, I like to add a little smoked paprika, and/or cayenne; for those who tend toward savory herbs, I recommend fresh rosemary or dill). Pop them in the oven at 425 degrees for about 10-15 minutes, until crispy. You can enjoy them on their own, or with the humus/guacamole you made. I also like mine dipped in spicy mustard.
I cut my sweet potatoes into chunks and boiled them with about a teaspoon of salt until they reached my desired tenderness. I quickly chopped one leek, and the remainder of the broccoli* (from tofu/broccoli night), and a tablespoon of fresh ginger, and put everything in my favorite non-stick skillet with a few grinds of fresh black pepper. I waited until the potatoes were almost done, then started the vegetables (heat-level: medium); just before the close, I threw in two teaspoons of capers and a generous handful of fresh, roughly-chopped parsley. I, personally, wanted for my broccoli to be pretty crunchy (as a point of contrast to the soft potatoes) -- but if you want yours to be softer, cover the skillet, turn down the heat, and be patient.
*Even the main, thick broccoli stem is edible -- and, like the potato skins, you should eat it. I ran over mine once with a peeler, then chopped the whole stem into bite-sized pieces.
And... ta da! I know -- where are steps 5-ininity? I said this one was easy. I served my potatoes and vegetables with the leftover tzatziki sauce from falafel night (natural soy yoghurt, a squeeze of lemon juice/a bit of lemon zest, and a little fresh parsley) -- but the soy yoghurt alone, margarine, or a drizzle of olive oil would also be nice alternatives.
In fact, I was so excited about how astonishingly little time this meal took to prepare that I even forgot to photo-document the end product. Here's a leftover cooked sweet potato, looking less-than-thrilled about having to do this alone.
Thursday, January 24, 2013
Falafel.
23 January 2013.
Baked Falafel, with Eggplant and Greens.
That's right -- falafel is vegan. It's easy to make yourself at home, and if you make it yourself, you can also eliminate some of the oil by baking rather than frying.
In my last post, I wrote about the epic bag of chickpeas I found in the pantry. tin & I ambitiously soaked and cooked all 500g of them, which means that, in spite of the large jar of humus I made, there were still chickpeas to be eaten. I used about 200g for the humus, and probably about 300g for the falafel. (Yes, there are still chickpeas in my refrigerator -- but not for long.) You're, of course, also welcome to use canned chickpeas.
I put the chickpeas in my food processor along with two tablespoons of whole wheat flour. For flavor, I added the juice & zest of half a lemon, freshly ground black pepper, and 3 Tbsp. of chopped fresh parsley. I gave the whole thing a whirl until it formed a crumble (like the humus before). I then added a drizzle of olive oil (not more than a tablespoon) and salt (to taste).
Using a soup spoon, I scooped about 2 Tbsp. of the mixture at a time -- and I got my hands dirty. You'll need to work the mixture your hands a bit and encourage the crumble to form a ball. Put the balls on a baking sheet lined with parchment paper, about 1/2 inch apart. They'll need to bake for about twenty minutes -- turn them over halfway through the baking time.
Falafel is traditionally served in pita bread with salad greens and diced tomatoes. You're, of course, more than welcome to honor tradition. I put a twist on it by serving my falafel balls with a side of eggplant and cooked greens.
It's important to remember that just eliminating animal-based products is not alone a recipe for good health. Like our omnivorous counterparts, vegans also have to beware of the ratio of proteins, carbohydrates, fats, etc. that make an appearance on our plates. As a general rule of thumb, I try to cover at least half of my plate with vegetables. Having a nonstick skillet at your disposal, as well as nonstick pots, are your best defense against adding unnecessary fat to your food -- an onion and garlic have enough "liquid" in them to cook in a nonstick skillet without any additional oil.
I used half of a medium-sized eggplant, slicing it into 1/4" rounds (the rest of the eggplant will keep for a few days in your refrigerator). I placed the eggplant rounds along with the falafel balls on my baking sheet and sprinkled them with salt and pepper to taste. I then popped the baking sheet into my oven, preheated to 350 degrees. They, like the falafel balls, will need to be turned over midway through the baking time.
As I planned to cook my greens rather than serving a raw salad, I chose two sturdier specimens: a small bok choy and half of a medium-sized radicchio. I sliced one medium-sized white onion and two cloves of garlic (yes, I sliced my garlic -- you are welcome to dice if you wish). For a little kick of flavor, I sliced one bulb of fennel, greens & all. I put the onions, fennel and garlic in the pot first and allowed them to cook with a pinch of salt and a few grinds of fresh black pepper until the onion was translucent. I then added the chopped bok choy and radicchio (both will cook down, so leave the pieces fairly large), covered, and cooked on low, stirring occasionally. Don't cook it to death -- the "salad" component will only take a couple of minutes to reach the desired tenderness. Turn the heat off and leave it covered if you're still waiting on the oven.
To finish it all off, I prepared a sauce in the spirit of tzatziki -- which is yoghurt based. Fortunately, there are plenty of soy alternatives to yoghurt (you'll probably find them, with the rest of the soy products, next to the soy milk, margarine and tofu in the refrigerator section). I used Provamel -- the "natural" flavor is great with baked potatoes (instead of sour cream), as a thickener in soups and sauces, and as-is on cereal, with fruit, or mixed into oatmeal. I used about 1/2 cup of soy yoghurt, 2 tsp. of lemon juice, and the zest of half a lemon. I finished it off with a tablespoon of fresh parsley, and stirred it all together -- done.
We enjoyed our falafel balls with the aforementioned sides, a dab of the tzatziki, and warmed sesame-seed bread that tin picked up from a local Middle Eastern corner store.
Sandwich Spreads/Dips/Sauce Bases
23 January 2013.
Sandwich Fixin's.
One day a week, I set aside an extra hour or two to chop up, cook, mash, purée -- you name it -- everything but the kitchen sink. Eating bread (in the spirit of the open-faced sandwich) is a favorite go-to in a German household. But as all American school children can tell you, eating the same sandwich every day gets old pretty quickly. So on this day, Spread-Making Day, I try to get really creative. This week, I made four different, yet complimentary, spreads -- and now I'm passing them on to you. This week's spreads are a little less exotic -- indeed, I included two classics (at the end) that should be a staple in pretty much every (vegan) kitchen.
Of course, you can buy plenty of great spreads that just happen to be vegan (peanut butter is certainly one of them). But a quick look at the ingredients will reveal that many of those things contain lots of oil and chemical preservatives, turning a good thing into... something, I'm not entirely sure. Eating vegan is, for me, about eating fresh, preferably locally-grown, in-season, "real" ingredients -- it takes a little more time than picking up a can of something ready-made at the grocery store -- but it is most definitely worth it. Your body will thank you. When you make everything yourself, from scratch, you control how much sodium, how much fat, and how much sugar you will be ingesting. And I think that's a very good thing indeed.
Red Beet & Turnip.
Admittedly, there is one ingredient that makes an appearance every week in my kitchen: red beets. You can buy red beets preserved in a glass, and they'll work just fine. But if, while strolling through the produce department, or the farmer's market, you see real, raw beets*, in the flesh... try them. Take them home, peel them (as you would a carrot), and don't worry -- your hands won't be pinkish-purple forever.
Beets are, perhaps, not everybody's favorite. It took me a while to learn to like them, which can be said for many elements of vegan cuisine -- not because these vegetables aren't delicious, but because the average person simply isn't used to them. Vegetables can be subtle or bold, earthy, sweet, bitter... And just like when you were a kid, you might have to keep trying them, over and over. But be patient -- your taste buds will readjust. Beets are an excellent source of vitamin C, and their betaine content protects against cardiovascular disease/stroke.
*If your beets still have their leafy stalks attached, EVEN BETTER. The leaves are also edible (and delicious).
I began with two medium-sized beets, peeled and cubed. Cooked beets are sweet and earthy -- I thought that adding a black turnip would add a the perfect "bite" -- and even more vitamin C! (I currently have a cold, so it's too late for me... But maybe not for you.) Both black turnips and beets are in-season during the winter months, so this is the prime time to enjoy both at their peak. I peeled and cubed the turnip as the beets, put all of them in a small pot, and added a little bit of water -- enough to cover about one-third of the pot's contents. Cover, and keep at a low boil until everything is tender (you can pierce it easily with a fork). Stir occasionally, moving the vegetables from the bottom to the top.
I like to allow my cooked vegetables to cool down a little bit before putting them in a food processor, but if yours can take the heat, there's no need to wait. Retain the little bit of liquid in the pot, transferring it along with the vegetables into the food processor.
At this point, if you purée only the vegetables, you'll likely create a thick soup. Which, if you ask me, is a meal in and of itself. But to turn it into a sandwich spread, I add about 1/3-1/2 cup of almonds. They'll absorb some of the liquid and give the entire mixture a bit more substance. And there are lots of good-for-you things hiding in these nuts -- Vitamin E (an antioxidant which prevents cancer), lots of protein, good fats (yes, there is such a thing)...
Blend everything together until smooth. If the mixture is still too thin to hold up on a slice of bread, add more almonds.
Sesame Pea.
This is by far the easiest -- you can do this while the beets & turnips are cooking.
To make this one, I opened & drained one can of peas. I use peas as a base for quite a few spreads because they are relatively neutral... But above all, because they are surprisingly nutrient-dense for their size. There's more protein in a 100-calorie serving of peas than in a handful of almonds or a dab of peanut butter -- Vitamins A and C, B vitamins, and TONS of Vitamin K -- good for your bones. And they're always accessible -- canned or frozen, you can quickly add peas to pretty much anything.
I wanted a lot of sesame flavor -- so I used about 2 Tbsp. of sesame seeds -- but anywhere between 1 and 2 will do the trick. Toast them in a skillet -- covered (otherwise they will end up everywhere but in your skillet) -- for two minutes (until they first start to spring around). You don't need to add any oil -- the seeds contain enough on their own.
Put the peas and sesame seeds in your food processor, give it a buzz, and... voila! You're already finished.
Guacamole.
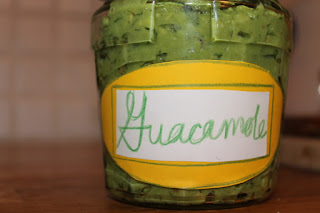
Almost as easy as sesame pea -- you've probably eaten it before, maybe even made it before. Here's how I make mine.
I started with four mini avocados (that would be two regular-sized avocados). An avocado is ripe & ready to eat when (usually) the peel is a little bit darker, and when the fruit gives way a little when pressed. Cut them open (lengthwise) and scoop out the seed. Using a spoon, the flesh should easily come away from the peel.
I then very finely chop one clove of garlic. I add it, along with a few healthy grinds of fresh black pepper, and about 2 tsp. of dill, to the avocados in a mixing bowl. I don't use a food processor to make guacamole (I use a potato masher, or simply the back of a fork) -- but to make the whole affair take less time and energy, you can certainly throw everything in the food processor. Using a food processor will likely give you a pretty smooth product, and as I like mine to be a little thicker/chunkier, I find I can better control the outcome when I do everything by hand. At any rate, you want to mix & mash everything together.
To finish it off, I add the juice of half a lemon and a little bit of lime zest* (really just a few rubs). I chopped about 2 tablespoons of fresh parsley, and added salt (to taste).
*An alternative is to use the juice of a lime and to swap parsley for cilantro.
I use guacamole on bread/sandwiches, with pretzels/pita chips, even as a "sauce" for pasta (with olives, onions, and mushrooms).
Humus.
This one can take more or less time, depending upon how you begin. I began the humus-making process on Saturday when tin & I discovered a 500 gram package of dried chickpeas still kicking around in the pantry. To prep dried chickpeas, put them in a pot and cover with cold water -- they're going to swell to about twice their size, so keep that in mind during the pot-selection process. Soak them for at least 12 hours (up to 24). Rinse them, then go through them slowly by hand -- remove any that look sketchy (dark spots, etc.). You can return them to the same pot, cover with water again, and simmer until tender (about an hour, maybe longer). Don't add salt -- they'll stay hard.
To make humus, you certainly don't need a full 500 grams of chickpeas. I used about 200g. I put them in my food processor along with two cloves of garlic, and the juice & zest of half a lemon. I added 2 Tbsp. of tahini, and a drizzle of good olive oil. Blend it together -- it should create a sort of crumble. Slowly add water until it forms a paste.
To finish it off, I added about two tablespoons of chopped fresh parsley, black pepper, and salt.
I enjoy my humus, as my guacamole, with pretzels/pita chips, as a dip for cucumbers/carrots/peppers, and it's the perfect base for sandwiches with leafy greens, tomatoes and red onions. Humus is especially great on toasted, warm sandwiches.
Wednesday, January 23, 2013
"Spaghetti"
22. January 2013.
Spaghetti (with Carrot-Tomato Sauce).
I, like most runners, like to schedule my long runs and spaghetti nights to coincide. Whilst on the treadmill, I was, within five minutes, already fantasizing about the various sauce options at my disposal. Around minute twenty, I remembered the carrot purée still kicking around in our refrigerator.
Once a week, I make various spreads to use as bases for sandwiches (more on that in the next post). During least week's epic blending festivities, without really thinking it through, I cooked up three big carrots (including one beautiful purple one) and made them into a paste. When tin tried a spoonful the next day, she rightly concluded that simply eating puréed carrot reminded her of baby food. We put the jar back in the refrigerator and I promised to "come up with something to get rid of it."
I've used squash as a base for many pasta recipes (especially oven-baked specialties) because of its creamy consistency and sweet/savory flavor. I'm not a huge fan of imitation meat/cheese products, but I, like every other human being trying to make the switch to an animal-/earth-friendly, healthy lifestyle, didn't want to lose all of the beautiful textures found in animal-based proteins. I won't lie, I had a hard time giving up cheese -- and it's not easy to mimic that flavor, or its creamy melty-ness. But a good squash (butternut, hokkaido, etc.) promises a pretty similar mouth-feeling.
I know what you're thinking -- a carrot is a root vegetable, not a squash.
Luckily, carrots & sweet potatoes are good flavor partners for squash, if not suitable substitutes.
Since the carrot purée was already on hand*, I began by putting a pot of spaghetti on the stove -- with a pinch of salt, and let them boil in peace. I had some leftover, large hollow noodles -- not enough for an entire meal -- so I mixed them together with some traditional wheat spaghetti noodles.
*If you are starting from square one, the first step is selecting your carrots. You probably think that seems self-explanatory and not worth a description, but I disagree. Remember my purple carrot? There are SO many beautiful colors when it comes to carrots (and potatoes), and I recommend that you try them all. Each has a subtly different flavor & sweetness. And above all, I find that the biggest joy of vegan cooking is the opportunity to work with the entire spectrum of colors. Don't be afraid -- each color has its own set of vitamins and minerals to offer. -- Anyway -- Whatever colors you have on hand, peel them, and cut them into rounds. You'll want to put them in a pot with just enough water to cover about 1/3 of them -- simmer them on low, covered, until soft enough to purée, stirring occasionally to move carrots from the bottom to the top & vice-versa (remembering that, thanks to the rising steam, those on top are also cooking). You'll need a little bit of liquid to make the purée, but if you got overly-anxious about the possibility of scorching your carrots and thus added too much water (which, you're right, is certainly better than too little), you can drain off a bit of it (but save it -- it's full of awesome vitamins! You can add it to the water you use the next time you make rice/couscous/bulgar -- oatmeal --, anything that absorbs water.)
This will take a while, more or less time depending upon the quantity of carrots in your pot. I recommend preparing it ahead of time, on the weekend -- it'll keep surprisingly long in your refrigerator and be ready to use later in the week.
While my pasta was boiling, I chopped one clove of garlic and about 1 Tbsp. of fresh ginger. I put both in a nonstick skillet along with one medium-sized white onion, roughly chopped. I added, as always, a few grinds of fresh black pepper and left the skillet alone for a moment to chop two sun-dried tomatoes. Sun-dried tomatoes have a really intense flavor as it is, but I recommend giving yourself some time to test various kinds. A good jar of sun-dried tomatoes contains not only great tomatoes, but the most wonderful oil packed with herbs -- each brand has its own special combination, and if you're patient enough/not willing to settle, you'll find your favorite(s). In my kitchen, nothing goes to waste, so the quality of the oil in that glass is very important to me.
I added the two sun-dried tomatoes along with two fresh Roma tomatoes (cut into chunks) to the skillet, gave the whole thing a quick stir, and covered it again.
I then drained the pasta, retaining about one ladle-full of the water (which I set aside for a moment), and returned the pot to the stove. I emptied the contents of my skillet also into the pot, and the carrot pureé. You want to create a thick sauce out of the carrot purée, so don't add the entire ladle of water at once -- take your time and stir it in a bit at a time, because once it's too soupy, there's no going back. The advantage of adding the water from your pasta is that it contains some of the starches derived from the noodles -- it'll help to give the sauce the classic thickness (and stickiness -- so that it will cling to the noodles) that you expect. I added a drizzle of oil from my jar of sun-dried tomatoes, stirred everything really well, and let all warm through for a minute before turning the heat off.
At this point, you're ready to eat. I served mine with chopped fresh parsley, a bit of grated fresh nutmeg, and black pepper. (And a glass of red wine.)
tin & I both agreed last night that no food looks less appetizing when photographed than pasta. Hopefully you'll disagree, and give this recipe a shot.
Tuesday, January 22, 2013
Stuffed Peppers
21 January 2013.
I had two bell peppers -- one yellow, one red -- and they were starting to look a little... shriveled. I had good intentions when I bought them (as I always do when I go grocery shopping), thinking I'd make a nice pasta or something over the weekend. Obviously, I didn't, because on Monday night they were still there. It was going to be stuffed pepper* night.
*Personally, I don't like stuffed green peppers. I would suggest red or yellow. I find that green peppers are better suited to grilling.
I started a pot of black lentils (about 1/2 cup) in vegetable broth (1:2, like rice). I covered the pot, brought them to a boil, reduced to a simmer, and let them go until they had absorbed the liquid and continued to cook them on low until almost burned (I wanted some to be a bit crunchy -- but that decision, ultimately a matter of taste, is up to you).
While the lentils were cooking, I chopped two cloves of garlic and a medium white onion. I decided to work with seitan -- about 50 grams -- cut into small cubes. (Remember that everything -- lentils, onion/garlic, seitan -- will end up inside of a pepper. You will want to keep everything smaller than bite sized.) I put it all in a nonstick skillet and started it on low, with some freshly ground black pepper. I also added capers -- tin & I love them, some people don't -- but ultimately, the capers replaced a pinch of salt that, should you choose not to use capers, should be added.
To keep everything from drying out -- or worse yet, burning -- inside the pepper, I needed to create some kind of liquid-y counterpart. I had three Roma tomatoes that were also starting to look a little overripe -- I gave them a rough chop (this time, size isn't your primary concern -- they'll cook down. About bite-sized/a little bigger will do just fine). Once the onions are starting to look shimmery, you can add the tomatoes. I then added the zest of one lemon, about a teaspoon of raw sugar* and covered the skillet.
*When cooking with tomatoes and other acidic ingredients, adding sugar helps to take away the sour/bitter edge that they take on when cooked.
At this point, you should turn your back to the stove to give everything time to jazz & mingle together -- again, resist the urge to keep stirring and poking around. To occupy myself and take my mind off of what may or may not have been going on under the lid, I figured it was a good time to get the peppers ready. It may not look like much, but for most people, one pepper will be enough. Simply cut around the tops (keeping fairly close to the stems, cut a ring about the size of a half dollar) -- when you remove the top, most of the seeds should be attached/come out with it. Now, carefully get your hands in there and rip out the white membranes (you don't want to get too aggressive, now -- you'd rather leave a little bit behind than punch through the pepper). There will be some seeds floating around in there -- it's okay.
Preheat your oven to 400 degrees.
I then returned to the stove and took the lid off of the onions/garlic/capers/seitan/tomatoes. To the skillet, I added a splash of quality balsamic vinegar, gave it a good stir, and covered it for another minute. I then emptied the pot of lentils* into the skillet, mixed it all together, and turned off the heat.
*It should now be clear to you why I burned my lentils a bit, because you'll notice that the mixture in the skillet it rather soft. The lentils and seitan will, on the whole, bring a "chewy" element to the table, but letting a few lentils get overdone will add a satisfying "crunch" to party with the pepper which, when cooked, will be a little bit crunchy, a little bit soft.
Stuffing the peppers is pretty self-explanatory: with a small spoon, pack the mixture into each pepper (really stuff it in there, pushing it down with the back of the spoon -- you don't want for it to dry out, nor do you want for anybody to go hungry). Line a baking sheet with parchment paper and place the peppers on it, upright. Bake for 15-20 minutes, until peppers are starting to turn brown.
I served my peppers with an extra scoop of the filling that didn't fit inside, and a drizzle of olive oil (a DRIZZLE, don't drown them). And of course, a nice glass of wine.
Monday, January 21, 2013
Black Bean Tofu, Cabbage & Broccoli with "Pickle" Rice
Last Night's Dinner (20 January 2013):
per tin's suggestion, it started with a solid foundation: tofu & rice.
A few weeks ago, after polishing off another massive jar of pickles, we asked ourselves what one might do with the delicious "juice" left over -- we don't like to throw food away. I know that most people don't look at the pickle juice and think of food, but you should, because for the true pickle-lover, it's the perfect liquid for a super-special pot of rice. Depending upon just how much you love pickles, you can use as much or as little of the leftover vinegar/mustard seed/pepper/etc. mixture as you want.
tin & I really, really like pickles. So when we make our pickle rice, we eliminate the water component completely and use just the pickle juice & rice in a 2:1 ratio. Put both in a pot, bring to a boil, cover & simmer until all of the liquid has been absorbed. Don't uncover it* and poke around in there, worse yet, stir -- just trust the cooking process.
*There's vinegar in there, and it's trying to cook off. You don't want to inhale it, trust me, because you'll ruin what could have been a perfectly delightful meal, coughing. It's not pleasant, so really, seriously, resist the temptation to stir.
While the rice was cooking, I chopped up a medium-size white onion and cubed some tofu. I had some leftover savoy cabbage (about half of a large head) and some broccoli. I started the tofu & onions on their own in a non-stick pan -- after about 2-3 minutes, I added a tablespoon of black bean garlic sauce. One of my personal favorites -- you can definitely find it at any Asian food market and I'd say pretty much every grocery store by now. Add enough water to get a good puff of steam (I like to use leftover "pasta water" -- the water everybody pours down the drain after cooking spaghetti). Cover quickly & cook on low for about 2 more minutes. Uncover, add the cabbage and broccoli, and another splash of water. You don't want to make a liquid-y sauce, but you also want to make sure that everybody in the pan is getting in on the action from the black bean garlic paste. At this point, I added the grated rind of 1/2 a lime and the juice of the same half to the pan, along with a few grinds of fresh black pepper. Cover again and cook on low until the cabbage & broccoli meet your desired crunch level -- I like mine to stay fairly crispy (about 2-3 minutes).
Spoon the rice into the bottom of a bowl; top with tofu & vegetables. Serve with soy sauce and fresh basil.
Greetings (Literally)
Since I have all of these hours in the day and they need to be filled, I've gotten into making my own handmade cards again. I'm not complaining about the down time -- quite the contrary -- I'm starting a new job on the 20th of February, which means that I have officially less than a month to make a whole stock pile of these things. The only problem is that I seem to send them as fast as I make them. (Or maybe that's how it's supposed to be.)
I had an especially hard time letting go of this one, for whatever reason. I think that little subconscious hint of warm, summery weather on my desk was somehow counteracting the snow outside.
Subscribe to:
Posts (Atom)